A lot of traders are staring at charts every day, taking setups that feel reasonable in the moment, then wondering why they keep getting chopped up. Usually the problem isn't effort. It's that they're trading without a map.
Support and resistance levels give you that map. Used properly, they help you choose better entries, place cleaner stops, avoid random trades, and stay inside strict prop firm risk rules. This article is educational only and not financial advice. Trading involves risk of loss.
Introduction Why Your Charts Need a Map
Most losing trades don't start with bad intent. They start with vague chart reading. Price is moving, a candle looks strong, momentum feels real, and the trade goes on without a clear reason tied to structure.
That's where support and resistance levels matter. They give you fixed reference points on a chart so you can stop reacting emotionally and start making decisions with a plan. If you know where buyers defended price before, where sellers stepped in, and where price is likely to hesitate, you stop chasing and start waiting.
For active traders, that shift matters even more in a prop environment. You can't survive daily loss limits and drawdown rules by taking random stabs in the middle of nowhere. You need levels that define where you're wrong before you enter.
Practical rule: If you can't point to the level that invalidates your trade, you don't have a trade. You have an opinion.
A clean chart with a few meaningful levels beats a messy chart full of indicators every time.
Understanding the Core Concepts of Support and Resistance
At the simplest level, support is where price tends to find buyers. Resistance is where price tends to find sellers. Think of support as a floor and resistance as a ceiling. Price may bounce between them, break through them, or test them again later.
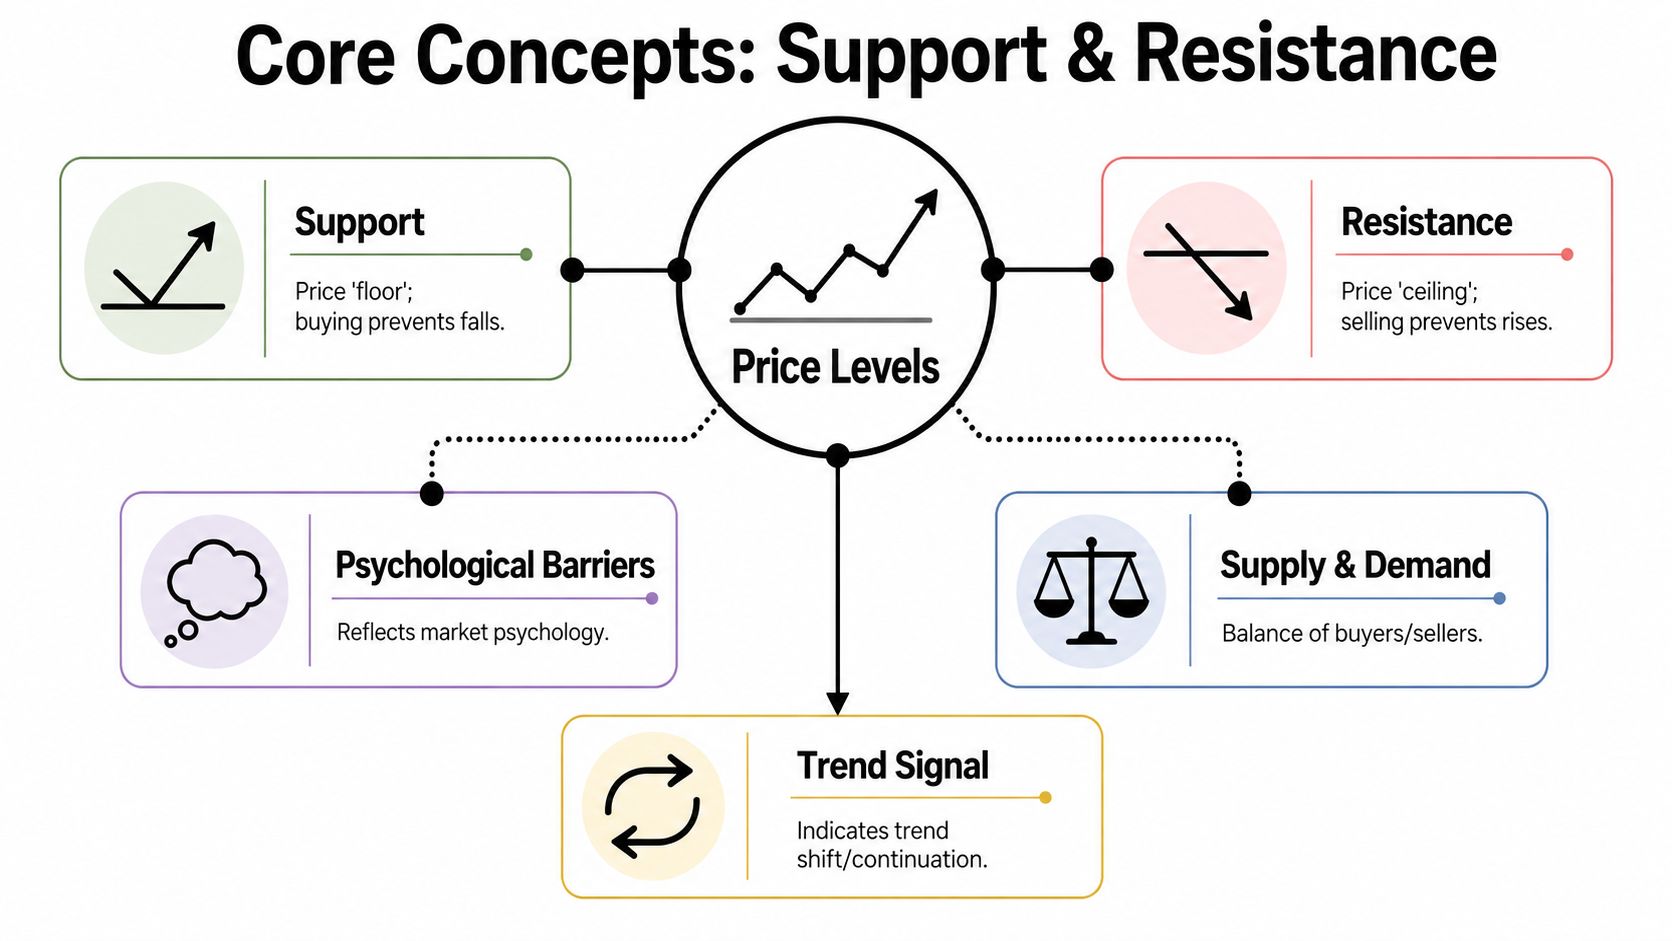
That sounds basic, but the important part is what sits underneath it. These levels aren't magic lines. They're areas where traders remember pain, profit, and unfinished business. Buyers who missed an earlier move often wait near support. Sellers who got trapped near a prior high often defend resistance.
Why these levels keep showing up
Markets move because traders make decisions around price. When a market reverses from a clear area, that area sticks in memory. The next time price returns there, people act again.
Common reasons a level matters:
- Prior rejection: Price hit the area before and turned sharply.
- Repeated interaction: The market tested the same zone more than once.
- Visible structure: The level stands out on a higher timeframe.
- Order clustering: Entries, exits, and stop losses often sit around obvious levels.
That's why support and resistance levels work best as areas of interest, not exact prices. If you treat every level like a laser-precise line, normal market noise will stop you out.
What traders are really seeing
A bounce from support tells you buyers still have interest there. A rejection from resistance tells you sellers still see value in defending higher prices. A clean break through either one tells you one side just lost control.
Market structure starts to connect with support and resistance. If you're still fuzzy on swing highs, swing lows, and how structure shifts, study market structure trading alongside these levels. The two concepts belong together.
The level itself matters less than how price behaves when it gets there.
Support and resistance are not permanent
Newer traders often mark a level once and treat it like law. That's a mistake. Levels weaken when price keeps hitting them. Each test can absorb more resting orders. A level that held cleanly before may break later because the order flow around it changed.
Keep these ideas in mind:
| Concept | What it means in practice |
|---|---|
| Support | An area where buyers may defend price |
| Resistance | An area where sellers may cap price |
| Break | One side overwhelmed the other |
| Retest | Price returns to the broken level to confirm the move |
| Role reversal | Old resistance can become support, and old support can become resistance |
The biggest mistake is assuming the level alone creates the trade. It doesn't. The level gives context. Your job is to read the reaction.
How to Identify and Draw Basic Levels on Your Charts
Most traders draw too much. They mark every minor turn, every wick, every intraday hesitation, and the chart turns into noise. Clean support and resistance work better because they force selection.
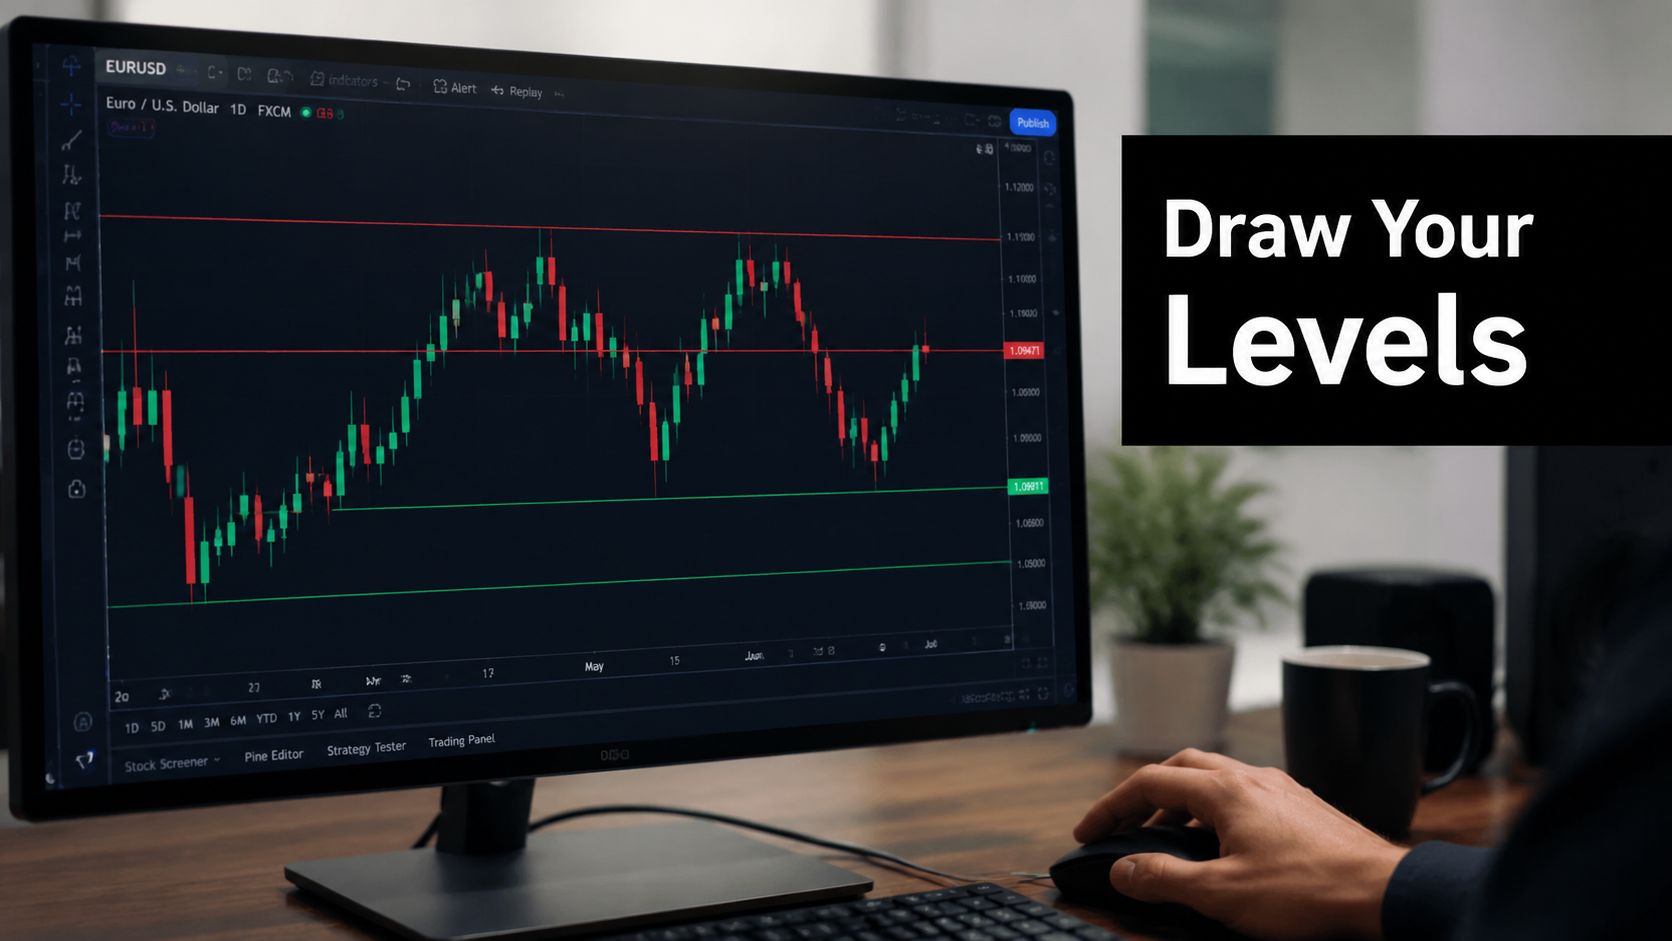
On platforms like cTrader and DXtrade, the process is straightforward. The skill is in deciding which levels deserve attention and which ones don't.
Start from the higher timeframe
Open the Daily or the 4-hour chart first. Don't begin on the execution timeframe. Lower timeframes show too much noise and tempt you to mark weak levels that don't matter outside the current session.
Look for obvious swing highs and swing lows. If a level is easy to spot from a zoomed-out view, it has a better chance of affecting price than a tiny intraday pivot no one else cares about.
Use this sequence:
- Mark major turning points on the Daily or 4-hour chart.
- Note repeated reactions where price respected the same area more than once.
- Drop to the 1-hour or 15-minute only after the higher timeframe map is clear.
- Refine the level into a zone if price reacts across a small band rather than a single line.
What a strong basic level looks like
A level is more useful when it has history. That doesn't mean older is always better. It means the market has shown you the area matters.
Good candidates usually have some combination of:
- Multiple touches: Price reacted there more than once.
- Sharp rejection: The market moved away with intent after touching it.
- Clear visibility: You don't need to squint to justify it.
- Alignment with trend context: A pullback into support in an uptrend often matters more than a random mid-range shelf.
If you want a tool-based starting point, a support resistance indicator can help spot obvious areas faster. Don't outsource the job to the tool, though. Use it to speed up chart review, then keep only the levels you'd still trust by eye.
New traders often ask where to draw the line. The better question is whether the area changed behavior before.
Lines, zones, and trendlines
Horizontal levels are the first thing to learn. They're the easiest to spot and the most practical for beginners. But you still need to draw them well.
A few chart-marking rules that help:
- Use bodies for consensus: If several candles closed around the same area, that zone often matters more than one stray wick.
- Respect wicks for rejection: If long wicks repeatedly stab into an area and reverse, widen your zone to include them.
- Keep the chart readable: If you've drawn more levels than you can explain in one minute, delete some.
- Color-code your levels: For example, use one color for higher-timeframe levels and another for intraday levels.
Trendlines also count as support and resistance. They're diagonal instead of horizontal, and they work best when they connect clean swing points in a trending market. Don't force them. If you need to adjust a trendline repeatedly to make it fit, it isn't a useful trendline.
A simple drawing checklist
Before you trade off a level, check this list:
- Is it visible on a higher timeframe?
- Has price reacted there before?
- Are you treating it as a zone if price is messy?
- Does the level line up with your trade direction?
- Can you place a stop beyond it without wrecking your risk?
That last point matters more than most chart books admit. A level may look clean, but if the required stop is too wide for your risk rules, it's not your setup.
Exploring Advanced Support and Resistance Types
Basic horizontal levels get you far. But real charts don't always behave with clean textbook symmetry. Price breathes, overshoots, front-runs, retests, and sometimes slices through obvious lines before showing its real intent. That's why more experienced traders expand from lines to a broader support and resistance framework.
Zones instead of exact prices
The first upgrade is simple. Stop thinking in single ticks or exact pennies. Think in zones.
A zone accepts that price can trade slightly through a level and still respect it. That matters in forex, indices, crypto, and commodities because liquid markets still have noise. If you put blind faith in a perfectly precise line, you'll often get tagged out by a routine probe.
A good zone usually forms around:
- A cluster of candle bodies
- Repeated wick rejection
- A prior base before expansion
- A retest area after a breakout
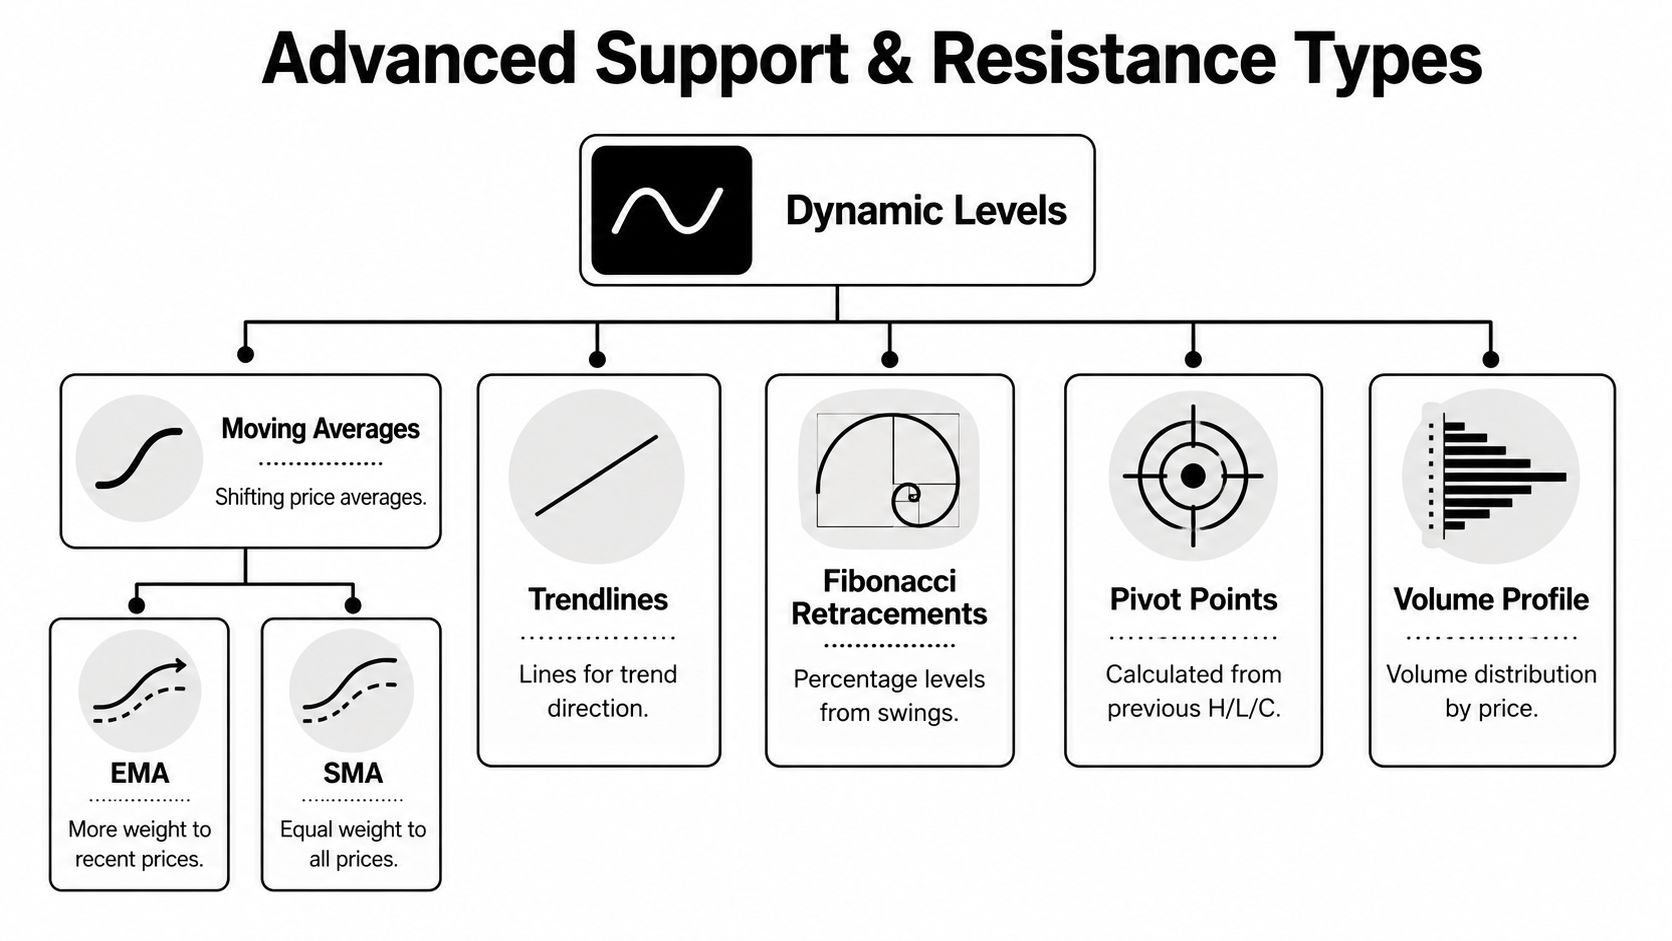
Dynamic levels that move with price
Not all support and resistance levels are horizontal. Some shift as the market trends.
Here are the main ones traders use:
| Type | Best use case | What to watch for |
|---|---|---|
| Trendlines | Trending markets | Clean respect across multiple swing points |
| Moving averages | Pullback trading | Price reacting around a widely watched average |
| Pivot points | Intraday structure | Session-based reaction areas |
| Volume profile areas | Acceptance and rejection zones | Heavy trade concentration versus thin areas |
Moving averages can act like dynamic support or resistance, especially when many traders watch the same average. They're not magical. They're useful because they create a shared reference. Trendlines do something similar, but with market geometry instead of averaging.
Institutional-style reference points
You'll also hear traders talk about order blocks, which usually refer to a prior area where price based before a strong move away. Traders use them as potential return points where larger participation may have entered before.
Used properly, they can help. Used badly, they become another labeling exercise. The test is simple. If the area led to a decisive move and still makes sense within the broader structure, keep it on the chart. If you're marking every small pause as an order block, you're overfitting.
Another common tool is Fibonacci retracement. It's best treated as a confluence tool, not a standalone trigger. If a retracement level overlaps with a horizontal level or a prior reaction zone, your map gets stronger. If it appears in empty space with no structure, ignore it. For a practical walkthrough, review how to draw Fibonacci retracements.
Strong trades usually come from stacked evidence, not a single drawing tool.
When to use what
Many traders get lost in the process of piling on every advanced method at once. Don't.
Use a simple decision rule:
- In a range, prioritize horizontal zones and prior turning points.
- In a trend, prioritize pullback zones, trendlines, and dynamic levels.
- In a fast intraday market, use pivots and nearby session structure for context.
- In a swing setup, lean more on higher-timeframe zones and broader retracement areas.
The goal isn't more analysis. The goal is cleaner decision-making. Advanced support and resistance types help when they clarify price behavior. If they add clutter, drop them.
Building a Trading Strategy with Support and Resistance
Marking levels is analysis. Making money from them depends on execution. Most traders know where support or resistance sits. Fewer know how to trade the reaction without hesitating, forcing entries, or moving stops once the trade starts hurting.

There are two practical ways to build around support and resistance levels. Trade the bounce, or trade the break. Both can work. Both also fail when used in the wrong context.
The bounce setup
A bounce trade assumes the level will hold. You're trading rejection, not escape. This works best when the market is ranging, slowing into the level, or pulling back within a larger trend.
A bounce long near support might look like this:
- Price approaches a known support zone from above.
- Momentum into the level weakens.
- A rejection candle forms, or price fails to continue lower after touching the zone.
- You enter only after price proves buyers are responding.
For a short at resistance, flip the logic.
Bounce trade checklist
- Location first: The level must already matter on the chart.
- Reaction second: Wait for rejection, hesitation, or failed continuation.
- Entry trigger: Use a candle close back away from the zone, a lower-timeframe structure shift, or both.
- Stop placement: Put the stop beyond the zone, where the trade idea is invalid.
- Target: Aim for the next meaningful area of opposing structure.
This setup fails when traders buy support just because price touched it. That's lazy trading. A level is not a command. It's a place to watch behavior.
Don't buy support while price is still falling hard into it. Let the market prove that buyers are actually there.
The breakout setup
A breakout trade assumes the level will fail. You're trading expansion after compression. This works best when price has tested an area repeatedly, built pressure underneath it or above it, and then closes through with intent.
There are two ways to handle it.
Immediate breakout entry: Enter on the break if the close is decisive and momentum is obvious.
Retest breakout entry: Wait for price to break, pull back, and hold the old level from the other side before entering.
Many traders do better with the retest because it reduces emotional chasing. You miss some fast runners, but you also skip a lot of fake breaks.
Breakout trade checklist
- Repeated testing: The level has been attacked multiple times.
- Compression: Price isn't rejecting hard anymore. It's leaning on the level.
- Break: A strong close clears the area.
- Confirmation: Either follow-through or a clean retest.
- Stop: Back inside the old range or beyond the failed retest point.
- Target: The next untouched structure zone.
Choosing the right play
You don't need both setups on the same level. Pick the one the market is showing you.
| Market behavior | Better strategy |
|---|---|
| Price rotating cleanly between boundaries | Bounce |
| Price repeatedly pressing into one side | Breakout |
| Wide, messy swings with no clean reaction | No trade |
| Strong trend pulling back into prior structure | Bounce with trend bias |
A practical execution model
A simple support and resistance plan for active traders can fit on one screen:
- Bias: Uptrend, downtrend, or range.
- Level: Mark the nearest real area, not five of them.
- Scenario: Bounce or breakout.
- Trigger: Candle behavior, structure shift, or retest.
- Invalidation: Where the idea is wrong.
- Target: Next logical reaction area.
- Size: Small enough that one loss doesn't affect your next decision.
That last line matters most. A decent strategy with controlled size survives. A good strategy with oversized risk blows up anyway.
Risk Management for Prop Trading Success
In prop trading, technical skill matters. Risk control matters more.
A trader who can mark support and resistance levels perfectly but sizes badly won't last. A trader with average chart reading and strong discipline can stay in the game long enough to improve. That is the true hierarchy.
Why levels matter more in a rule-based account
In a prop environment, every trade has to fit inside hard limits. If your account has a flat 5% daily loss limit and up to 10% maximum drawdown, a sloppy stop isn't just a bad trade. It becomes a threat to the account itself.
That changes how you should use support and resistance.
The level is not there to help you predict. The level is there to help you define risk. It tells you where your trade idea stops making sense. Once you know that, you can size the trade correctly.
Build the trade around the stop, not the dream target
A lot of traders still do this backwards. They see a nice move on the chart, imagine the payout, then squeeze in a stop wherever it fits their preferred size. That's how challenge accounts get wrecked.
Use this order instead:
- Mark the level
- Decide the setup
- Place the invalidation beyond the level
- Calculate size based on that stop
- Skip the trade if the size or stop doesn't fit your rules
If the proper stop is too wide, reduce size or pass. There's no prize for forcing a trade that violates your own risk framework.
A funded trader's edge isn't finding perfect levels. It's surviving imperfect ones without damaging the account.
Daily loss limits change trade selection
When a daily loss cap exists, you can't take every decent-looking setup. You need selectivity.
Good filters include:
- Only trade higher-timeframe levels
- Avoid mid-range entries
- Skip first-touch trades if momentum is reckless
- Pass on setups that need wide stops in volatile conditions
- Stop trading if you're no longer reading price objectively
Many traders fail evaluations. They don't lose because the strategy is useless. They lose because they keep firing after a couple of poor reads and let frustration do the rest.
Drawdown control is a structural skill
Maximum drawdown rules punish inconsistency. Support and resistance help because they create a repeatable framework. You know where to enter, where the trade fails, and where to take profit. That removes a lot of the impulsive decision-making that causes account damage.
A practical prop trader mindset looks like this:
| Weak approach | Professional approach |
|---|---|
| Trade every touch | Wait for clean context and confirmation |
| Put stops right on the line | Place stops where the idea is truly invalid |
| Increase size after a loss | Keep size stable and process-driven |
| Chase breaks late | Wait for retest or skip |
| Focus on payout fantasies | Focus on staying inside risk rules |
If you want funding, treat risk management as the strategy. Support and resistance are just the framework that lets you apply it cleanly.
Frequently Asked Questions and Your Next Step
What happens when support breaks and becomes resistance
That's called role reversal. If price breaks below support, then rallies back into that same area and fails, the old support may now act as resistance. The same works in reverse after a breakout above resistance.
Don't assume the flip will happen automatically. Wait for price to test the area and show rejection or acceptance.
How do you avoid false breakouts
You won't avoid all of them. What you can do is stop trading every first move through a level.
The cleaner approach is to wait for one of these:
- A convincing close beyond the level
- Follow-through instead of immediate snapback
- A retest that holds from the new side
If price breaks, stalls, and drops straight back into the prior range, that's a warning sign. Many false breakouts look strong for a moment because traders pile in too early.
Should beginners use lines or zones
Start with horizontal lines to train your eye. Shift to zones once you notice that price rarely respects one exact print. Most active traders end up using zones because they reflect real chart behavior better.
How should you backtest support and resistance
Keep it simple. Pick one market, one timeframe, and one setup type first. Screenshot charts, mark only the levels you would have seen in real time, and log whether the trade met your rules.
What you're testing isn't whether levels exist. They do. You're testing whether your execution rules around those levels are consistent enough to trust.
Trading is risky, and there's no guaranteed outcome from any chart pattern or structure method. But if you can read levels clearly, wait for confirmation, and keep risk tight, you'll already be trading more professionally than others who consistently enter trades based on arbitrary candle movements.
If you're ready to apply that discipline in a structured environment, explore MyFundedCapital. You can compare funding programs, review account types, and start a challenge built around clear rules for traders who take risk management seriously.